Headings in Word
Headings are managed with Styles. When creating headings, use the heading levels provided in the Styles gallery – don't rely solely on big, bold text.
Apply a Heading Style
- Select the Home tab.
- Select a line of text in the document.
- Select the desired heading style from the Styles gallery.
Authors may modify the look and feel of heading styles. Use the existing heading styles, modifying them to suit your preference, instead of creating new heading styles.
Open the Styles Pane
To keep the full Styles gallery open while you work:
- Select the Home tab.
- Beneath the Styles button, select the pop-out button.
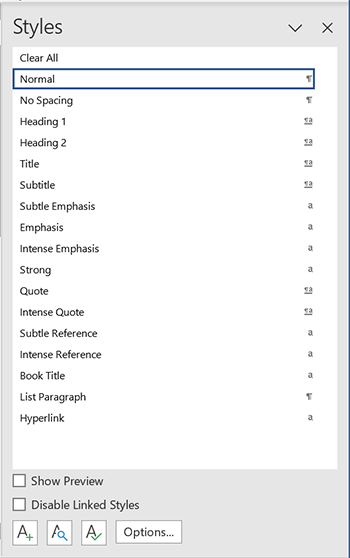
The Styles pane will open and remain open for use until closed.

- Select the Home tab.
- Select the Styles Pane button next to the Styles gallery.
The Styles Pane will open to the right of the document and stay open for use until closed.

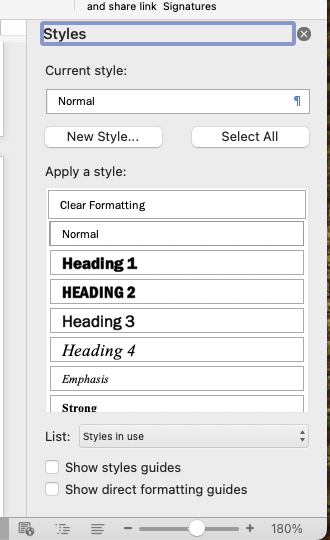
Note: on small displays, the Styles gallery may be replaced with a Styles button.
Navigation Pane
The Navigation Pane provides an interactive outline of a document's heading structure. When headings are used in a document, authors and readers can jump to sections of the document by selecting a heading from the Navigation Pane.
To open the Navigation Pane, select the View tab and check Navigation Pane. Once open, select the Headings tab within the Navigation Pane.
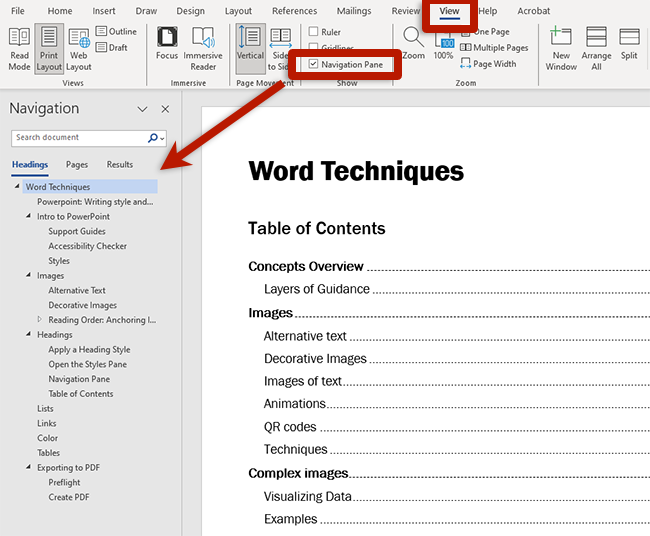
To open the Navigation Pane, select the View tab and check Navigation Pane. Once open, select the Document Map tab within the Navigation Pane. The Document Map icon looks like a bulleted list:
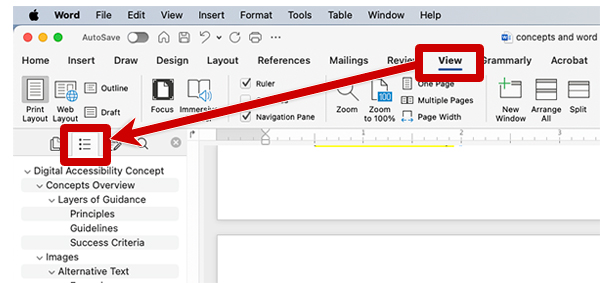
Table of Contents
Word can generate an interactive Table of Contents based on the heading structure. To generate a Table of Contents:
- Select the References tab.
- Select Table of Contents and choose the desired style.
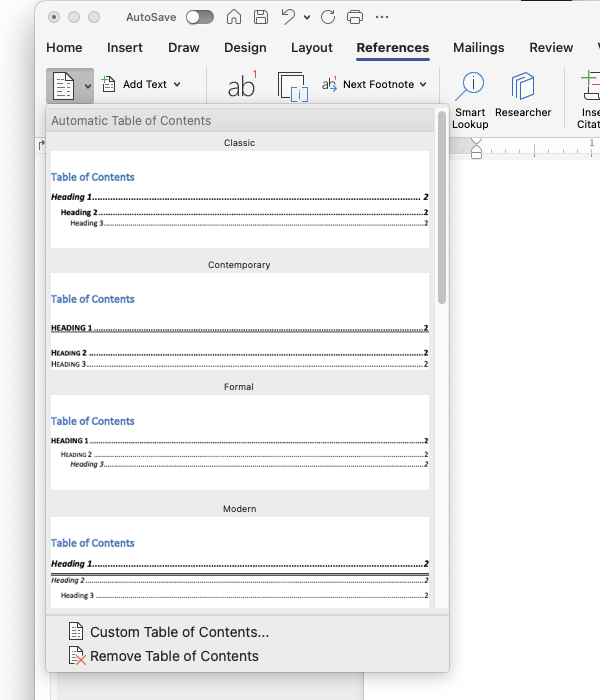
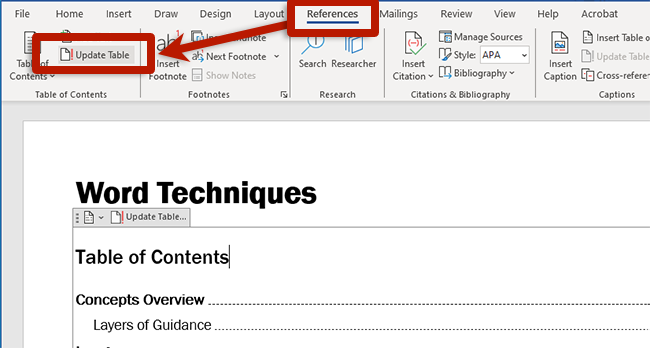
Once the Table of Contents is generated, authors can update page numbers by selecting Update Table from the References ribbon.
