
Exporting to PDF in PowerPoint
The following instructions depend on Acrobat Pro, available to Clemson users through the Adobe Creative Cloud.
Caution
A PowerPoint presentation containing only basic design elements (text, shapes, images, tables) can be exported to an accessible PDF. However, use of complex objects like SmartArt can result in inaccessible PDF output. For electronic distribution, share the PowerPoint slides directly instead of a PDF.
Prepare for Export
- Run the Accessibility Check in PowerPoint. Resolve any issues prior to exporting.
- Automated tools cannot detect all accessibility issues. Manually review the following: color contrast, color reliance, structure (slide titles, tables, lists), descriptive links and alternative text.
- Assign a Title to your document.
To assign a Title to your document:
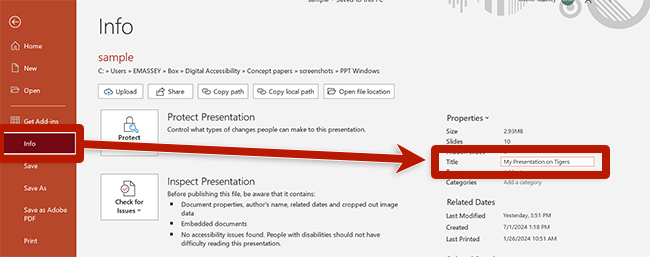
- Select File.
- Select Info.
- Under Properties, verify or update the Title text field.
- Select File from the App menu.
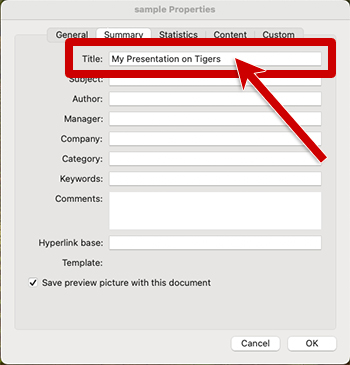
- Open the Summary tab in the dialog box.
- Enter the document's title in the Title field.
- Select OK.
Create PDF
To export a PowerPoint to PDF:
- Select Save As from the File menu.
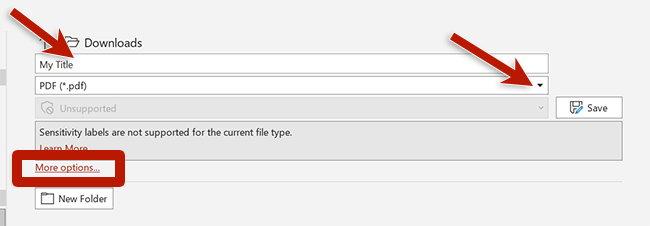
- Review or edit the file name.
- Select PDF from the drop-down options. Note: if there are accessibility warnings in your file, a prompt will appear in a highlighted box directing you to recommendations.
- Update the location to save the PDF, if different.
- Select More options...
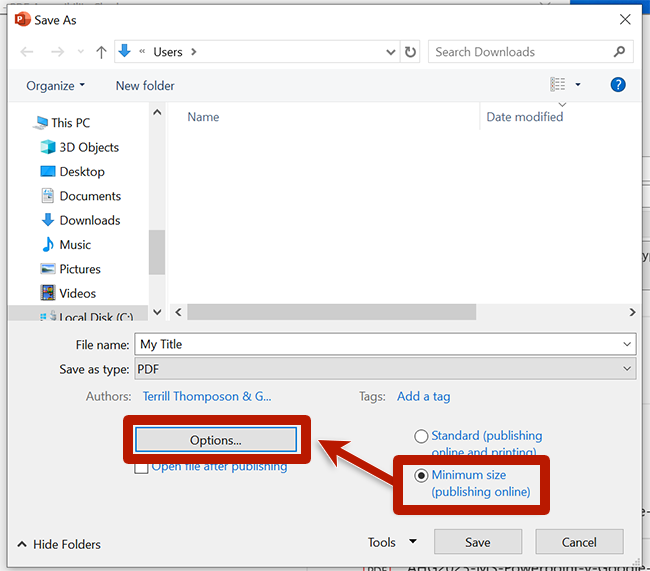
- In the Save As dialog box, select Minimum size (publishing online) then open the Options window.
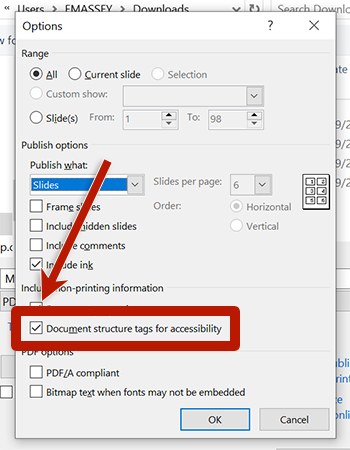
- In the Options window, check the Document structure tags for accessibility and select OK.
- In the Save As dialog box, select Save to create the PDF.
- Open the Acrobat tab. If you do not see an Acrobat tab, install Adobe Acrobat Pro.
- Select Create PDF in the Acrobat ribbon.
- If a dialog box appears, asking if you want to use cloud services to create a PDF, choose Yes.


